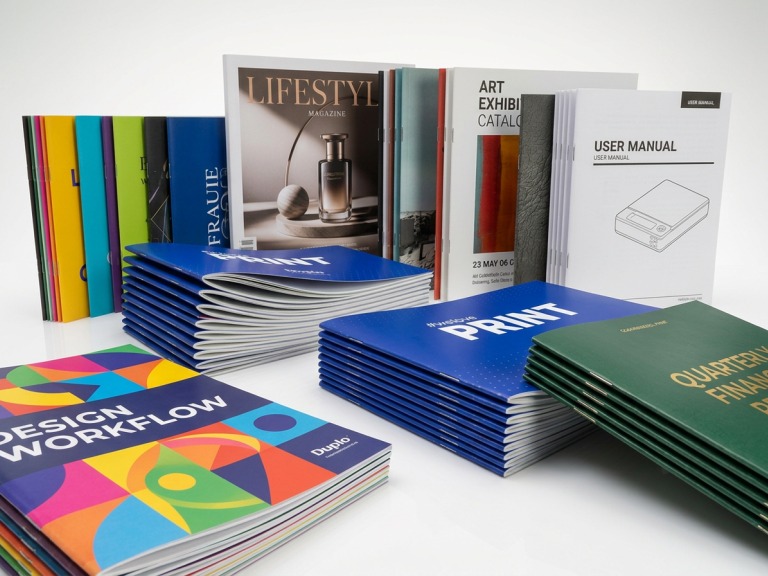
Spot UV has the ability to make anything feel instantly more upmarket and luxurious. That being said, it’s those designs that have true thought behind them that really stand out– so how do you use spot UV to achieve that incredible impact the Duplo DuSense is capable of?
Take a look at these examples of spot UV to discover the Dos and Don’ts for exceptional print embellishment.
Do…
…Create Interesting Textures; Thanks to spot UV’s unique feel, you can really appeal to people’s sense of touch. This book cover has managed to create the illusion that it’s made out of a leather texture. Also, the contrast between the DuSensed logo and the page really brings the brand to attention. People love running their fingers over the contrasting texture, this design uses soft touch laminate with this extra thin UV embellishment to really enhance that leather feeling.
…Make Use of Repetition; One simple way to create an effective spot UV design is to repeat a specific element. This could be a symbol related to your company or your actual logo. We particularly like how this design embellishes on both sides to really add that premium feel, you could imagine this being applied to a luxurious invite or presentation folder, as well as business cards.
…Create Subtle Patterns; Spot UV is at its most effective when used without changing the colour beneath it. When applied to a large block of colour, the glossy finish is enough to distinguish spot UV shapes from the background, meaning that really subtle, sophisticated images can be created. This example really shows off how luxurious this can be.
…Be Sparing; As with many things related to design, less is more. As this design shows so well, sometimes just a small amount of spot UV can be incredibly effective. Sometimes you don’t need repeating patterns or textures. Sometimes demonstrating an extremely fine design, utilising the intricate and accurate capacity of the DuSense will maximise that wow effect.
…Make Use of Negative Space; When most people think of spot UV designs, their instinct is to create new elements in spot UV. But, what if you could really emphasise the contrast between spot UV finish and uncoated stock, and create a feature out of the absence of spot UV, this could be your key to differentiation and added value!
Don’t…
…Use Too Much
You want a contrast between coated and uncoated stock, otherwise nothing is emphasised by the spot UV because it’s all spot UV.
…Conflict with the Printed Design
Spot UV is reflective in nature due its glossy finish. That means, that when it is held at a certain angle, in certain lights, it can become impossible to see what underneath is, this is especially the case when the spot UV design does not match the printed design.
…Include Small Gaps
Take advantage of the intricate nature of the DuSense and allow fine lines of separation between your Spot UV. You want to create an enhanced texture that engages the holder’s senses, in our opinion the more intricate the more impactful.
Don’t forget with the DuSense you can produce variable-height effects of 20-80 micron thicknesses in the same pass with detail as fine as 6pt font!
Hopefully we have inspired you with some great ideas for your next Spot UV project.
To learn how to create and upload your spot UV artwork so that your designs comes out exactly the way you want look out for our guide to 5th layer videos coming soon! The office shredder, model 2604CC, is built for easy, continuous operation with a swift shred speed of 0.08 m/ second. This mid-size shredder sports a 260mm feed opening, 4mm shred width, a strip cut shred type, with a sheet capacity of 26 – 28 sheets. It’s also sporting an easy-switch control element, which indicates your shredding status, and a safety protection system (SPS) package to ensure the only things being shredder are documents, soft metal materials, credit/ plastic cards and CDs/ DVDs.